顯示具有 電熱鍋食譜 標籤的文章。 顯示所有文章

2017年8月20日 星期日

香煎蓮藕肉餅 Pan-fried Lotus Root Patties


香煎蓮藕肉餅 — 近年在好多懷舊中式餐廳都會食到。在澳洲,買到新鮮的蓮藕的機會不是常常有,多數是急凍的。難得最近有新鮮蓮藕買,當然買來煲蓮藕綠豆湯同埋煎這個蓮藕餅食。

今次使用電熱鍋的六格盆煎肉餅,用油比用在平底鑊或煎鍋的少,煎得比較厚身有點像漢堡扒,剛好是6塊的份量;如喜歡香口一點可做成約10-12塊,每塊薄一點。

食譜(6塊漢堡扒份量/10-12塊薄身肉餅份量)

材料 
蓮藕      250克
豬肉碎     250克
鹹魚(去骨剪碎)1.5湯匙(選擇性)
芹菜葉/蔥   12克
蛋       1隻

調味料
糖       2茶匙
豉油      1湯匙
 (如沒有加入鹹魚碎,可自己加一點鹽/豉油)


做法

1. 將蓮藕洗淨,刨去外皮。

2. 蓮藕用刨絲器刨成絲狀,或用刀切成幼條。切粒亦可,但蓮藕口感會較硬身。

3. 芹菜葉/蔥切碎備用。

4. 將雞蛋以外所有材料及調味料放入一大碗中,順時針方向攪勻。


5. 材料均勻後打入雞蛋,繼續攪勻至軟滑狀。


6.  將已混合的肉分成6分(薄身為10-12份),弄成肉丸狀,方法可參考以下影片。

7.  電熱鍋6格盆塗油,開中火。放入肉丸。(用一般平底鑊或中式圓鑊做法請參照「小貼士」部分)


8. 將肉丸壓平,轉至中大火煎。此食譜份量剛好是6塊厚度跟6格盆深度一樣的肉餅。


9.  2-3分鐘後可以反轉至另一邊煎,間中可將肉餅左右調換位置讓受熱均勻。


10. 間中反轉一下,不需要太頻密。全程約煎15分鐘,兩邊金黃色。薄身相對時間短一點。


小貼士
  • 蓮藕切絲/切小粒皆可,但粒狀較硬身,或會有「銀」牙感覺。
  • 如使用一般平底鑊或中式圓鑊,鑊中加油中火預熱,油熱後轉中小火。加入肉丸後壓平,兩邊各煎約5-8分鐘。薄身時間相對短一點。
  • 使用唐芹的芹菜葉較香,芹菜莖本身也十分有營養,用來清炒也十分好吃。如不喜歡芹菜可用青蔥代替。
示範影片。如看不到以下影片可按這裡


ENGLISH RECIPE (6 Patties; 10-12 Thin Patties)

Pan-fried Lotus Root Patties

Ingredients
Lotus Root                         250 g
Minced Pork                        250 g
Diced Salted Fish                  1.5 tbsp (optional)  
Chinese Celery Leaves            12g  
Egg                                   1pc

Seasoning
Sugar              2 tbsp
Soy Sauce          1 tbsp

Steps
  1. Wash the lotus root and peel the skin.
  2. Shred the lotus root on the largest holes of a box grater, or cut it into shreds.
  3. Chop the Chinese celery leaves
  4. Mix all ingredients with seasoning (clockwise) except an egg.
  5. Add the beaten egg after the other ingredients in above mixed well.  Continue mix it until it looks soft and smooth.
  6. Divide the mixture into 6 (or 10-12 if you prefer thinner patties), roll into a balls. (you may refer to the video for reference)
  7. Add a bit oil to each partition of the hot plate, preheat the hot plate in mid-heat.  Putting the balls to the hot plate.(Please refer to the 'Tips' on the method to cook the patties in a pan / wok).
  8. Shape the balls into patties,  change the heat to mid-high level and keep pan fried it.
  9. Flip into another side after 2-3 mins.  You can swap the patties sometimes to make sure all patties cook consistantly.
  10. Flip the patties one or two times but not too frequent.  Overall cooking time around 15 mins.  


Tips
  • You can either shred or dice the lotus root.  
  • If using pan or wok, preheat the pan with oil in medium heat.  Change the heat to mid-low after adding the balls.  Shaped it to patties and cook 5-8 minutes for each side.  (Thinner platties need shorter time)
  • You can replaced the celery leaves by using spring onion.


2017年3月5日 星期日

韓式泡菜煎餅 Korean Kimchi Pancake


食韓國料理,除左燒烤外,好多菜色都好好食,牛肋骨鍋,辣豆腐湯,韓式年糕等。而泡菜煎餅,差不多每一間韓國料理店都會食到,有時有些店還會有一小碟免費的作前菜。研究一下,其實做法主要是泡菜,少少海鮮,同薄餅漿混合一起再煎便可,自己在家都可以整到。

食譜(2-3人份)

材料
低筋粉     100 克
泡菜      120 克
泡菜汁     少許
魷魚/魷魚圈  60 克
蔥       10 克
水       125 毫升
油       1 茶匙
鹽       1/4 茶匙
糖       1/2 茶匙

魷魚醃料
糖       1/4茶匙
魚露/淡醬油  1/2茶匙

做法

1. 先將泡菜切條,蔥切幼粒。


2. 預備一小鍋熱水,魷魚放入熱水約30秒飛水,撈起沖凍水瀝水。之後切成短條,加入魷魚醃料備用。


3. 低筋粉過篩,分數次加入水攪勻開成幼滑粉漿。

4.  將鹽糖加入粉漿,再加入泡菜連汁、魷魚、蔥及油拌勻。


5.  平底鍋或電熱板塗上薄油開中火 (如想香脆一點可多一點油)。

6.  加入已拌好的粉漿,用膠刮刀幫助將材料掃平均。

7.  當煎餅底部開始出煙,將煎餅反轉另一面煎。如使用電熱板煎,建議將煎餅分成兩塊方便烹調。

8.  全程大約煎8-10分鐘,煎至兩邊表面金黃便可。可選擇整碟上碟或切件上碟。


小貼士


  • 以上為香軟版本,如想硬身一點可將1/5低筋粉改為中筋粉。
  • 魷魚可改為其他海鮮如蝦或青口粒,素食可改為金菇。

ENGLISH RECIPE (SERVE 2-3)

Korean Kimchi Pancake

Ingredients


Cake Flour                                    100 g
Kimchi                                          120 g
Kimchi sauce                                 1 tsp (from Kimchi, optional)
Squid / Squid Ring                        60 g
Spring Onion                                10 g
Water                                            125 ml
Oil                                                1 tsp
Salt                                               1/4 tsp
Sugar                                            1/2 tsp

Squid Seasoning
Sugar                                           1/4 tsp
Fish Sauce / Light Soy Sauce     1/2 tsp

Steps

  1. Cut the kimchi into strips, chop spring onion.
  2. Boiling water in a small pot, put the squid ring in the hot water for 30 second and wash it with cold water.  Cut it into small pieces.
  3. Sift Cake Flour in a mixing bowl, pouring water by few times and mixing well with the flour.
  4. Adding salt and sugar into mixture.  And then adding kimchi, kimchi sauce, squid pieces, spring onion, and oil and mix them well.
  5. Prepare a pan or hot plate with medium heat, wiping some oil in the pan.
  6. Pour the mixture into the pan.
  7. After few mins, turn the pancakes over to cook other side.  (cut the pancake into two pieces if using hot plate, it helps to flip over easier).
  8. Flip over the pancake few times and keep panfry it until its surface look like gold colour (it spends around 8-10 mins).  Cut it into pieces and it is ready to serve.


Tips

  • The above recipe makes a soft pancake, you can replace 1/5 cake flour(low-protein) by plain flour (med-protein) if you like harder one.
  • You can replace squids by other seafood like mussels or prawns, or enoki mushrooms if prefer vegetarian version


2017年2月13日 星期一

迷你抹茶千層蛋糕 Mini Matcha Crepe Cake


今年想來想去都想不到情人節整什麼甜品,朱古力又好似不太特別,突然想起可以整千層蛋糕。由於只有兩人吃不用太大,又不想逐塊瑪麗餅(crepe)煎,之後想起可以用電熱版煎一大塊再用圓模印出來,所以今次就用電熱版試下。

食譜(兩個3吋他他圓形模)

瑪麗餅材料
中筋麵粉     60克
幼砂糖      1湯匙
雞蛋       1隻
抹茶粉      1湯匙
牛油       30克
牛奶       120克

抹茶忌廉材料
抹茶粉      1湯匙
忌廉       150克
糖        10克

裝飾
抹茶粉      少許
鮮果       隨意

做法
1. 先將麵粉及抹茶粉過篩,加入砂糖拌勻備用。

2. 牛奶加熱到和暖(不要過熱),牛油加熱溶掉至液體狀。雞蛋倒入牛奶拌勻,再加入牛油完全拌勻。

3. 將蛋奶糊分兩次加入麵粉中,攪勻至幼滑粉漿。粉漿不要太杰身,如太杰可加入額外10克牛奶。

(以下部驟沒有電熱板可用平底鑊)
4. 將電熱板開至「warm」,倒入適量粉漿,快手拿起電熱板兩邊手柄將電熱板擺動令粉漿均勻鋪平整個鍋。如第一次不肯定份量可先倒入粉漿才開火加熱。
5. 瑪麗餅煎至微微漲起,表面粉漿凝固,用膠刮刀或小平鏟將瑪麗餅反轉另一面,多煎一會便可放到平盤或蛋糕墊上。

6. 整好的瑪麗餅必需用濕布蓋著放涼,否則會風乾變硬。


7. 再煎另一塊時,由於電熱板已加熱,可先關火一兩分鐘後,加粉漿擺動均勻後才開火。

8. 完成瑪麗餅後預備抹茶忌廉。忌廉加糖用攪拌器中速攪勻。

9. 忌廉開始杰身便可加入抹茶粉繼續攪勻,忌廉攪拌至挺身便可。

10. 使用圓形模(我使用的是3吋他他模,可用其他模具或用一張圓形紙幫助)印出圓形瑪麗餅,正常電熱板每塊碼麗餅可印出4-6個3吋圓形 。

11. 拿走多餘的瑪麗餅,這些剩餘的可以食用,不要浪費。

12.  印好的瑪麗餅記著用濕布蓋著防止乾掉。

13. 預備一個平碟,或使用平底碗反轉使用。鋪上保鮮紙,方便之後移動蛋糕。


14. 放上一塊瑪麗餅,塗上忌廉掃平,再加上另一層瑪麗餅再塗忌廉,如此類推。

15. 迷你版約12-13層便可,完成後用抹刀將旁邊掃平。


16. 令用底部保鮮鮮幫助拿起蛋糕移到甜品碟上,灑上少許抹茶粉再加點生果裝飾便完成。

小貼士
  • 如有電熱板6格烤板,可更方便一點不用印圓形。
  • 可使用一般平底鍋煎瑪麗餅。
  • 電熱板不要使用高於「low」。
  • 抹茶粉可更改成朱古力粉。

2017年2月8日 星期三

空心煎堆仔 Fried Sesame Ball


之前出了芋蓉煎堆仔的食譜後,很多朋友都想試整無餡的空心煎堆仔,同細糖一樣都係無餡煎堆的粉絲。不過大家都對整到空心有很多問題,我改良了一點做法,讓製作沒有餡料的煎堆外脆內軟糯,所以今次製作了影片給大家參考

影片在食譜尾部。如看不到可到以下連結:

食譜(迷你版6-8粒)

材料
糯米粉      50克
糖        20克
泡打粉      1克 (Baking powder)
梳打粉(可省略) 1克 (Baking soda)
油        1茶匙
芝麻       2 湯匙
水        35毫升

做法
  1. 將所有粉類及糖拌勻,加入油把粉類及油攪勻。
  2. 分兩次加入水,先加入30毫升,用手把粉類搓勻,粉類會慢慢變成塊狀。
  3. 如果還是很乾身或是還有粉狀餘下,可加入餘下的5毫升水搓成麵糰,麵糰不可太濕。
  4. 麵糰搓成光滑後,用保護紙蓋著防止水份流失,靜置15-30分鐘。此步驟十分重要。
  5. 芝麻浸水5分鐘,瀝乾備用。
  6. 將麵糰分成15-18克一粒搓圓(影片中是16克一粒)。
  7. 預備一小碟水,先將每粒麵糰輕輕沾水,再沾上芝麻。
  8. 將電熱板的章魚燒盤需要用到的小格每格倒入約1元大小的油,開至低火「low」,放入麵糰。
  9. 將麵糰輕輕反轉讓全粒麵糰都沾有油分,油熱後開始慢慢轉動麵糰。
  10. 之後開始慢慢按壓麵糰所將麵糰轉動,麵糰開始漲大,電熱板全程保持於「 warm」至「low」熱度內,不要高於低火,讓麵糰有足夠時間慢慢漲大及中心的麵糰熟透。
  11. 在電熱板全程約需10-15分鐘,煎堆表面金黃,按壓發漲後呈通透表面就完成了。

小貼士

  • 麵糰靜置是必需的,不要省去等待時間。
  • 按壓過程需要耐性,做出來才能做出空心而外皮不會硬的效果。
  • 由於空心煎堆沒有餡了,略加了點糖,此為少甜版,可自行調整。


2017年2月7日 星期二

章魚燒(章魚小丸子) Takoyaki


哈哈!自從買左個電熱板之後真係多了很多玩意。這部機隨機附有章魚燒板,我又是章魚燒粉絲,不可能不試一試吧!身在澳洲的我,看見很多朋友都在香港到處找章魚燒預拌粉,而我這邊都可以買到但不太便宜,之後搵資料發覺其實個漿其實都係用簡單材料混合,仲可以跟自己喜好調整自己喜愛的口感,彈性很多。

另外,原來章魚燒有一款很重要的材料很多香港做章魚燒的小店都會忽略,初時知道要加入這款材料我都會懷疑為什麼要加,試過後才發覺在日本吃章魚燒特別好吃都是加了它~~~ 子薑漬(醃子薑)

食譜(24粒)

材料
八爪魚(章魚)/八爪魚粒   ~120克(自行加減)
椰菜             50 克
醃子薑片           30 克
蔥              15 克
章魚燒醬汁          隨意
柴魚片/木魚花        隨意
紫菜碎            隨意
蛋黃醬/沙律醬        隨意
天婦羅碎粒(可省略)     1 湯匙

粉漿
低筋麵粉           150 克
冰水             500 毫升
雞蛋             2 隻
鹽              半茶匙
鏗魚粉(可用鹽/昆布粉代替) 半茶匙
日式醬油/淡醬油       1 茶匙
油              半茶匙


做法
1. 八爪魚腳切粒備用。如果使用新鮮八爪魚(我今次用的是小八爪魚),買回來多數已去除眼及內臟,洗淨後用熱水飛水後放涼切粒備用。


2. 椰菜、子薑、青蔥切碎備用。

3. 預備一隻大碗,放入鹽、鏗魚粉、日式醬油拌勻。

4. 加入冰水(不要加冰)拌勻,之後再加入蛋漿拌勻。

 5. 分3次篩入低筋粉,每次篩入後不要大力攪拌,輕力略拌勻便可。

6. 將粉漿過篩一次,將未溶的粉粒壓溶,粉漿變得幻滑,加入油備用。

7. 將章魚燒板搽上薄油,開小火,半分鐘後開始倒入粉漿至9成或剛滿。

8. 保持小火,順序加入八爪魚、醃子薑、椰菜、青蔥。

9. 加入材料後將電熱板轉為中小火,用章魚燒針/竹簽幫忙「界」開分開每粒的粉漿,將旁邊的粉漿撥到中間。

10. 章魚燒邊可以熟的時候,用章魚燒針將小丸子轉一轉(大部分半圓在上面 ),加入一隻粉漿填補多餘空間。

11. 之後間中轉動一下小丸子,讓小丸子平均受熱。間中將旁邊跟中間小丸子互換位置。直到小丸子外表金黃便可。

12. 上碟後,塗上一點章魚燒醬汁,再加蛋黃漿,灑上紫菜碎及柴魚片,便可食用。


小貼士
  • 使用冰水開粉漿令小丸子有外脆內軟的效果。
  • 加入低筋粉後不要過份大力攪拌。
  • 未用完的粉漿可用保鮮紙蓋好放入雪櫃,由於有生雞蛋,盡量即日或隔日用完。

ENGLISH RECIPE (24 pcs)

Takoyaki

Ingredient 
Octopus tentacles                ~120 g
Cabbage                              50 g  
Shreded pickled ginger      30 g
Spring Onion                     15 g
Takoyaki Sauce                  Own perference
Seaweed pieces                  Own perference
Dried Bonito Flakes           Own perference
Mayonnaise                        Own perference
Tempura crisps (Tenkasu)  1 tbsp (Optional)

Takoyaki Mix
Cake Flour                        150 g
Ice Water                          500 ml
Egg                                   2 pc
Salt                                   1/2 tsp
Bonito Dashi Powder       1/2 tsp
Japanese soy sauce           1 tsp 
/ light soy sauce
Vegetable Oil                    1/2 tsp

Steps
  1. Boiled octopus tentacles for 1 or 2 mins and wash it with cold water.  Cut the tentacles into dices.
  2. Chop cabbage, pickled ginger, and spring onion.
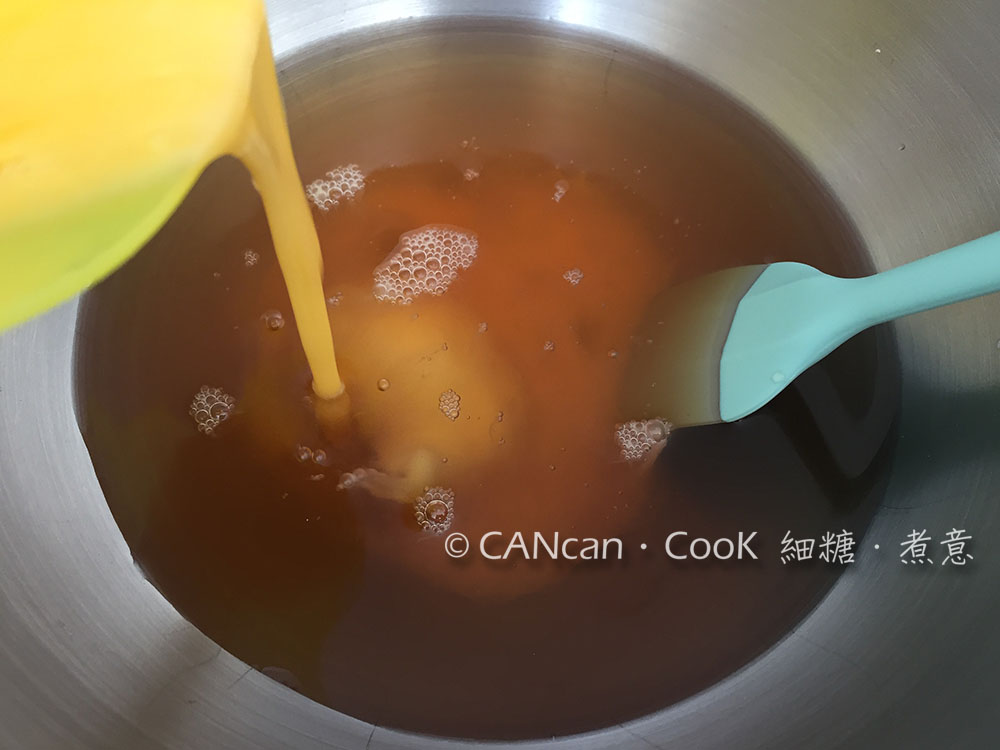
  3. Getting a mixing bowl.  Place bonito dashi powder, soy sauce, and salt and mix well.
  4. Pouring ice water (without ice) to the mixing bowl and mix slightly.  And then beat eggs and pour into mixing bowl as well and mix it well.  
  5. Adding 1/3 flour (using fliter) to the mixture and slightly mix it.  Repeat twice to mix all flour and it becames batter.
  6. Filter the batter to make sure the batter are silky and smooth.  Adding oil into the batter.
  7. Brush some oil to the takyaki pan, switch on the pan to low heat.  Pour the batter to the pan (90% full).
  8. Adding octopus tentacles, pickled ginger, cabbage, spring onion, and tempura crisps respectively.  Keep in low heat before all ingredients added.
  9. Turn the pan/hot plate into medium-low heat. Separate each takoyaki with bamboo skewers or takoyaki sticks and gather uncooked edges into each pieces.
  10. Rotate (around 90degree) the takoyaki balls with the skewers when the the balls become solid. Pouring a little bit batter in to the space after rotation.
  11. Rotate the balls again for each few minutes.  Pour a little bit batter if necessary to adjust the shape.  Cook until the surface become crispy and in golden color.
  12. Move the takoyaki balls into plate.  Brush the takoyaki sauce.  And then adding mayonnaise, dried seaweed pieces and died bonito flakes as toppings.

Tips
  • Using cold water helps to make the takoyaki crispy.
  • Mix slightly after adding cake flour, otherwise the takoyaki will be hard.
  • Extra batter can be covered by cling wrap and put in fridge.  Finish it within two days.