2016年10月31日 星期一

日式南瓜沙律 Pumpkin salad in Japanese style


平時我們在日本食自助早餐或者在香港日本式西餐廳應該都會發現薯仔沙律很常見。幾年前在銅鑼灣一間家庭式日本料理,他們有一款前菜是南瓜沙律,我和朋友便點來試試,吃過之後很難忘,之後我便上網找找有沒有類似的食譜,南瓜沙律食譜找到很多,像他們這款的沒有太多像樣,最後試了幾款之後再自己改一下... 終於試到這個自己喜歡的口味了!

這款南瓜沙律很簡單,由於材料不多,可以在弄其他南瓜菜式時留起一小部分作沙律用。兩個人當前菜吃弄一細份便可以,人多宴客時也可預先整一份作前菜,減輕宴客時的工作。另外這個沙律用的醬料不多,減去一些調味,也很適合小朋友。


食譜 (2人份) 

食材
南瓜        約300克
甘荀        半條(約30克)
粟米粒       30克
洋蔥        60克

調味料
英式芥末      1/2茶匙
沙律醬/蛋黃醬   1茶匙
鹽         少許
黑胡椒碎      少許


做法

1. 南瓜去皮去籽切大粒。甘荀、洋蔥切粒備用。洋蔥因為生食用,請使用熟食工具處理。

2. 預備一個蒸盤及一塊油布,油布先弄濕。如沒有蒸盤可省略,改用一般蒸煮方法(例:碟)

3. 在蒸煮用的煲或爐上倒入水煲滾。將南瓜、粟米、甘荀放入已鋪上油布的蒸盤上。

4. 水滾後將蒸盤放入,加蓋中火隔水蒸15分鐘。(使用其他蒸煮方法,請留意備註部分)

5. 蒸好後可試用筷子插入南瓜看看能否輕易穿過,穿過便可以,如仍是很硬便蒸久一點。蒸好的南瓜放涼約10-15分鐘。

6.  南瓜等蔬菜放涼後便可以壓蓉。如少量可使用一般食用叉,或可試用下圖之壓蓉工具或電動攪拌器。

7. 將南瓜及甘荀壓蓉,建議不需要把全部壓成蓉,部分可保留小塊狀也不錯。

8. 加入粟米粒,洋蔥粒及調味料拌勻。

9.  拌勻後便可食用,如喜歡凍吃或不是即時食用,請保持冷藏。建議兩三天內食完。

備註
  • 如弄給小朋友吃,可減去芥末及黑胡椒 ,及把洋蔥跟其他蔬菜一同蒸熟。
  • 如不是使用有孔蒸盤,使用其他器皿蒸南瓜及其他蔬菜時有可能在器皿中存有水份,蒸煮後務必把蔬菜隔開水份,必要時使用廚房紙吸收水份。蔬菜過濕會影響沙律質感。
  • 南瓜種類沒有特別要求,這次使用葫蘆狀的Butternut南瓜,在香港可以使用日式南瓜或其他品種(如外皮深綠色扁圓狀那種,在澳洲叫Kent pumpkin)


ENGLISH RECIPE (SERVE 2 IN ENTREE SIZE)

Pumpkin Salad in Japanese Style

Ingredients
Pumpkin                   ~300 g
Carrots                      ~30 g
Corn                         30 g
Onion                       60 g

Seasoning
English Mustard       1/2 tsp
Mayonnaise              1 tsp
Salt                           A pinch of salt
Pepper                      A pinch of pepper

Process
  1. Peel the pumpkin and remove the seeds, get the right portion and cut into dices.  Cut carrot and onion into small dices.  As we will eat the onion in uncooked conditions, please be aware the tools (knife and board) used.
  2. Prepare the steaming rack and the steam cloth.  Wash the cloth and make it wet.  If you do not have both materials, prepare a pot or wok and a plate to steam the food in tradional way.
  3. Boiling water in a big pot.  At the same time, put the pumpkin, corns and carrots into the steaming rack with the steam cloth in the bottom.
  4. Get the steaming rack to the pot, cover it and steam the veggie for 15 mins.
  5. After steaming, use chopsticks to test if the pumpkin soft enough.  If it is still too hard, extend the steaming time.  Rest the steamed veggie and let it cool down.
  6. Then prepare a fork / masher to mash pumpkin and carrot.  A fork will do for small portion salad.
  7. Mash pumpkin and carrot.  Suggest not to fully mashed and remain some pumpkin pieces.  
  8. Add the corns, onion dices and seasoning and mix it well.
  9. The salad is ready to serve.  Keep it in fridge if you like to eat in cold or eat it later.  Suggest to finish it within 3 days.

Remarks
  • If it serve for kids, you can skip the pepper and mustard, and steam the onion together with other veggie.
  • If you do not have steaming rack but using other way to steam, there may be some water on the plate after steaming.  The texture of salad will be affected if the veggie are too moist. You can use kitchen paper to help and make the veggie dry.   
  • There is no specific type of pumpkin use in this recipe.  We use Butternut this time.  You can try other types of pumpkin for this dish.

2016年10月25日 星期二

開心果杏仁小金磚蛋糕 Pistachio Financier


在香港,唔知大家有無食過一間連鎖法式三文治店的一件小蛋糕叫杏仁金磚呢?我第一次食這件杏仁金磚是很多很多年前了,當時這件蛋糕是隨三文治套餐一起的,放在咖啡旁邊,我和媽咪一食便愛上,當時好像賣幾蚊一件。
大概兩年前因為有一些該三文治店的現金券差不多到期要用,便想起這款小蛋糕,原來這款小蛋糕現在已經賣成10幾蚊,很貴呢!

其實這件小蛋糕步驟非常簡單,只要有焗爐/光波爐便能做到。這件邪惡的小蛋糕雖然細細件,但會令你不知不覺地吃不停口呢!

今次這個食譜已是減糖配方。另外加入了開心果仁粒,大家可隨自己喜好加其他果仁粒亦可。

食譜 (10-12件) 

材料
中筋麵粉      30g
杏仁粉(Almond meal)  75g
糖粉/砂糖     70g
無鹽牛油      85g
蛋白        3隻(約100g)
開心果肉      10g
雲尼拿油      1/4 tsp 或 2小滴


做法

1. 首先我們先預備開心果碎,可以用一個三文治袋把果仁袋起,在三文治袋下面鋪一塊乾布/毛巾,用擀麵棍把開心果敲碎。如果有石盅,輕輕盅碎亦可。備用。

2. 這個小蛋糕要用到啡牛油(Brown butter / beurre noisette),啡牛油可以用一般無鹽牛油加熱煮成,目的是減低牛油的水份令到牛油更香及蛋糕更鬆軟。先預備一個小鍋加入牛油慢火加熱。

3. 牛油煮溶後(左圖),慢火繼續煮,漸漸會出現白色小氣泡(右圖)


4. 煮多一會後,白色氣泡慢慢凝聚成小塊,牛油變得清澈及變成較深的金黃色。另外會見到油裡面出現一些啡色點點,這時可以熄火及離火靜上一會。

5.  用網篩把油塊隔開,把油倒入小碗中備用。(沒有網篩可使用即棄茶葉袋亦可)

6. 另一邊用一隻大碗,把杏仁粉、糖粉、麵粉加入拌勻。

7.  蛋白輕輕打發,之後加入已拌勻粉類的大碗中,同時加入雲尼拿油,輕輕拌勻。

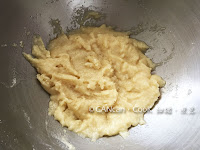
8. 加入啡牛油,慢慢搞拌成麵糊(下圖),靜止約15分鐘。不要過分攪拌,會令麵粉起筋蛋糕便變得硬身不鬆軟。之前放牛油的小碗留下待用,不要清洗

9. 預熱焗爐至180C。

10. 拿出剛才放啡牛油的小碗,上面還有啡牛油,用油掃把剩餘的啡牛油掃在蛋糕模上。使用一般牛油或固體菜油亦可,目的是方便蛋糕脫模。

11. 掃完蛋糕模可把模具放入雪櫃1-2分鐘,之後看到蛋糕模上的牛油凝固。

12.  將蛋糕漿倒入模具,約7-8成滿,輕輕用膠刮撫平(不用過分撫平,蛋糕漿遇熱後溶掉)。加入開心果碎在蛋糕漿上面。

13.  放入焗爐中層焗約12-15分鐘。間中留意一下蛋糕顏色。蛋糕焗至啡金黃色便可,此時關掉焗爐,開一條小隙,讓蛋糕在焗爐內多待5分鐘。

14.  蛋糕出爐後便可脫模,放在蛋糕架上放涼一會便可食用。太遲脫模,模具中的熱力會產生蒸氣回到蛋糕中。

備註:
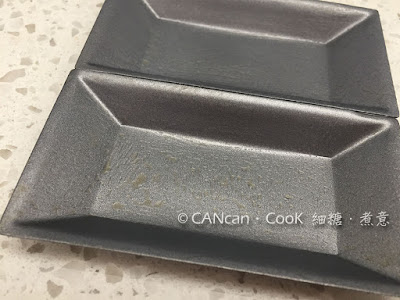
  • 如沒有長條形小蛋糕模,可用蛋撻模或鬆餅模代替。
  • 掃上蛋糕模的油一定要選用固體油類,才可做到容易脫模。
  • 杏仁粉不要用錯用來沖杏霜那種,杏霜的粉是用南北杏仁磨成的。今次用的杏仁粉是用外層啡色很多人當作零食那種大杏仁(Almond)磨成的粉。可在烘焙店或健康食品店找到。

ENGLISH RECIPE (10-12 pieces)

Pistachio Financier (Less Sweet Recipe)

Ingredients
Plain Flour                                  30g
Almond Meal                             75g
Icing Sugar / Caster Sugar         70g
Unsalted Butter                          85g
Egg White                                  3pc (~100g)
Pistachio nuts                             10g
Vanilla oil                                   1/4 tsp or 2 drops

Process

  1. Firstly, put the pistachio into a small freezer/sandwich bag.  Getting a towel and put it in the bottom of bag, break the pistachio by using rolling pin.
  2. And then we will make the brown butter (beurre noisette) by using unsalted butter.  Put a small pot over low heat to melt the butter.
  3. Butter getting melted and then some small bubbles come up.
  4. Keep boiling butter in low heat, the bubble became a little piece.  It become dark golden color and clear.  Switch off the fire and remove pot from heat.
  5. Pour oil into a small bowl and filter the bubble pieces.
  6. Get a big mixing bowl to mix almond meal, flour, and sugar together.
  7. Slightly blend the egg white. Pour to the flour mixture, adding vanilla oil and mix it well.
  8. Adding the brown butter and mix it well slightly with the flour mixture.  Rest for 15 mins.  Do not blend it too hard, it will affect the texture of the cake.  Keep the small bowl with brown butter and do not clean it.
  9. Preheat oven to 180C.
  10. Using the remaining brown butter from the small bowl, grease the cake mold.
  11. Greased cake mold can put in fridge for 1-2 mins.
  12. Pour the mixture into each mold (around 70-80% full).  Slightly flatten the mixture by spatula.  Adding the pistachio pieces on top.
  13. Bake the financier for 12-15 mins until it becomes golden color.  Switch off the oven and slightly open the oven door, rest the cake inside for another 5 mins.
  14. Take the financier out and remove it from the mold.  Keeping it too long in the mold will make the financier moist by the steam.  Now it's ready to serve.


Remarks

  • If you do not have financier mold, you can replace it by muffin or tart mold.
  • We should use the solid oil like butter to grease mold.
  • Do not use the chinese style almond powder which is used for almond sweet soup.


2016年10月19日 星期三

焗豬扒飯 Baked Pork Chop Rice in Tomato Sauce


焗豬扒飯(焗豬) - 對香港人來說應該不會陌生。細糖以前份工係長期要去唔同的客戶公司到做Project,有時一個人食飯間唔中都會走去買焗豬食,相信呢個飯應該可以係我將來打工仔回憶的其中一個部分。有時屋企無煮飯得我同細佬兩個買外賣食,每人一個焗豬,我就俾D飯同豬扒佢;佢就俾哂D蕃茄洋蔥我(總之蔬菜類)... 其實我鍾意食嘅唔係豬扒,而係個濃濃嘅蕃茄汁配炒飯,真係唔覺唔覺食哂先知飽!

整焗豬扒飯,主要分為3大部分,煎豬扒、炒飯、蕃茄汁,其他配料可根據自己口味或者家中已有材料加減。

食譜 (4人份)

食材:
豬扒         3-4 塊
豬扒可隨喜好選擇有骨/無骨,或使用豬柳亦可
白飯         4-5 碗
洋蔥         1/2 個
蕃茄         2-3 個
芹菜莖部(唐芹)   4-5 條
可自由更改或加入甘荀、甜椒、菠蘿等
麵粉         約40g
蛋          3隻
Mozzarella 芝士                 適量
可用其他芝士代替

蕃茄汁調味料:
茄膏         大半罐(約140g)
喼汁 (選擇性加入)   1 茶匙
糖          3 茶匙
雞湯         300 毫升
麵粉         2 湯匙
蒜蓉(約蒜頭2小瓣)   1 茶匙

豬扒醃料:
糖          1 茶匙
蒜蓉         1 茶匙
胡椒粉        少許
粟粉         1 茶匙
油          1 茶匙
豉油         2 茶匙
米酒         1 茶匙

做法:

1. 先處理豬扒(今次細糖沒有買豬扒,改用了豬頸肉)。將豬扒用清水沖洗一下之後用廚房紙吸乾水份。

2. 用肉鎚輕輕把豬扒鎚鬆,如跟細糖一樣沒有肉鎚,可以用菜刀刀背輕剁豬扒兩面。這部驟可令醃料更入味及令豬扒更鬆軟,剁鬆的豬扒變得扁大。


3. 豬扒加入豬扒醃料拌勻,最少醃30分鐘。豬扒醃料可加入少許薑蓉/薑汁,但要留意加了薑蓉不可醃太久。

4. 蕃茄切大粒,唐芹切成短條狀,洋蔥切大片備用。

5. 預備好基本材料後便可開始煮食,建議先煎豬扒,之後炒飯,最後煮蕃茄汁才放入焗爐焗。

6.  煎豬扒前預備兩隻碟/闊盆,將材料中的1隻雞蛋打散成蛋漿放在其中一隻碟,另一隻碟放大約40g麵粉。如發覺麵粉不夠可之後再添加,重要時要令到豬扒均勻地粘上麵粉。

7. 預備一隻平底鑊,加大約1湯匙油,中火煮熱。先把豬扒放入蛋漿,讓豬扒沾上蛋漿;之後將沾上了蛋漿的豬扒放入麵粉上,沾上一層薄薄的麵粉;接著把豬扒放到平底鑊煎。

8.  把豬扒放到上平底鑊後,以中小火慢慢把豬扒兩邊煎至淡金黃色,大約每邊煎3-4分鐘。注意沾上麵粉蛋漿後比較用易煎燶,不要太大火。

9. 豬扒煎到7至8成熟便可上碟備用,之後焗飯時會把豬扒焗至全熟。

10. 下一步預備炒飯,先把材料中剩下的兩隻蛋打成蛋漿備用。

11.  預熱焗爐180c。另一邊用一隻乾淨的鑊中加入1湯匙油,中大火預熱鑊。

12.  油熱後(可先滴一滴蛋漿試一下熱度,蛋漿立即變熟或有氣泡便可),將一半蛋漿倒入,用鑊鏟一邊把蛋漿打圈慢攪,慢慢蛋漿會成為炒滑蛋狀。

13.  將白飯加入,與蛋一起炒勻,為了每炒飯均勻成一粒粒狀,不時用鑊鏟(我炒飯時比較喜歡用矽膠刮捧)把結成塊狀的冷飯弄散,加入半茶匙鹽調味。

14. 炒至差不多時,把剩下的蛋漿平均倒入炒飯中炒勻,這個方法是令炒蛋有蛋絲之餘也有蛋漿沾在米粒上,炒飯味道會更香。炒好的飯放到焗飯的器皿中備用。


15. 將剛才煎好的豬扒放到焗盤中的炒飯上,如喜歡方便食用,可先把豬扒切件,之後吃飯便不用再慢慢把豬扒切開。

16. 用剛才炒飯的鑊(如沒有沾底不用清洗,可用廚房紙抹一下)開中火加一點油,先炒香洋蔥。之後放入唐芹一齊炒。接著加入蕃茄及蒜蓉(如果不想蕃茄太軟而硬身一點,可在加雞湯3分鐘後才加入)。

17. 接著加入茄膏繼續炒,然後慢慢篩入麵粉炒勻,此事蕃茄醬料會變得稠身。

18. 慢慢倒入雞湯,加入喼汁及糖拌勻。拌勻後繼續以中火讓汁料煮滾。這段時間可作試味,根據個人口味加入鹽/糖調整。

19. 醬汁大約煮5-10分鐘後會變得濃稠。煮至差不多像茄汁的濃度(汁料能掛在鑊鏟上)便可熄火。如果發現太濃可加一點水/雞湯,記著每次不要加大多,看情況再調整;相反如果太稀,可用少少麵粉加水(比例 1:1)拌勻才加入汁料。

20.  將煮好的蕃茄汁料倒入預備好的豬扒炒飯上,平均鋪好。

21.  隨喜好在汁料上面加入適量芝士。


22.  將飯放入已預熱的焗爐最少焗20分鐘。由於不同焗爐熱力不同,要細心留意焗爐情況,如芝士太快焦而豬扒未夠時間焗熟等情況。待芝士變金黃色便可以出爐上碟。


備註:
  • 如使用有骨豬扒,煎豬扒時間要長一點確保近骨部分也不會太生。
  • 唐芹可改為西芹、甘荀、菠蘿等蔬菜,煮法跟使用唐芹一樣。
  • 芝士可改用巴馬芝士(Parmesan),或片裝芝士。
  • 1茶匙=5g;1湯匙=15g


ENGLISH RECIPE (SERVE 4)

Baked Pork Chop Rice

Ingredients:
Pork Chop (Bone-in/Boneless)         4 pc
Cooked Jasamine Rice (cold)           4 serve
Onion                                                1/2 pc
Tomato                                              2-3 pc
Chinese Celery Stalks                       4-5 pc
Freely change to Celery, Carrots, Capsicum, or Pineapple
Plain Flour                                        ~40 g
Eggs                                                  3 pc
Mozzarella / Pizza Cheese                ~50 g

Tomato Sauce 
Tomato Paste                                     140g
Worcestershire Sauce (Optional)       1 tsp
Raw Sugar                                         3 tsp
Chicken Stock                                   300 ml
Plain Flour                                         2 tbsp
Minced Garlic                                   1 tsp

Pork Chop Seasoning:
Sugar                                                 1 tsp
Minced Garlic                                   1 tsp
Pepper                                                a bit
Corn Flour                                         1 tsp
Vegetable Oil                                     1 tsp
Soy Sauce                                          2 tsp
Chinese cooking wine                       1 tsp

Process

  1. Firstly we will prepare and season the pork chop.  Clean the pork chop and dry it by kitchen paper.
  2. Use the Meat tenderizer / the back side of the Cleaver make the pork chop soft and flatten in both side.
  3. Add the pork seasoning ingredients to the pork chop and rest it for at least 30 mins.  (You can add ginger mince into seasoning as well but it cannot be seasoned for too long time)
  4. Cut tomatoes and onions into pieces.  Cut chinese celery into short pieces.
  5. After all ingredients prepared, we can start cooking.  We suggest to pan-fry the pork chop first, and then cook the fried rice, and finally make the tomato sauce.
  6. Prepare two bowls/plates.  Crack one egg to one bowl and use a fork to beat it well.  And place plain flour in another plate.  You can add flour if it is not enough for the pork chop.
  7. Put a pan over a medium heat and add 1tbsp oil. On the other hand dipping the pork chop in the egg, and then take it out and press the plain flour onto both sides of pork chops.  Place pork chop to the pan. 
  8. Pan-fry the pork chop around 3-4 minutes each side in medium heat.  The surfaces of pork chop become light-golden colour.
  9. Pork chop are now in medium well and it will become well done later after baking.
  10. And now we can prepare the fried rice.  Crack another two eggs and beat them well.
  11. Pre-heat the oven to 180c.   At the same time put a wok over medieum heat with 1tbsp oil. 
  12. Pour half volume of eggs to the wok, stir it  slowly with a wooden spoon or a spatula. Keep gently stirring until the eggs looks silky and slightly runny.  
  13. Add the rice to the wok and add 1/2 tsp salt to the rice.  Break the rice pieces with the spatula and stir it well with eggs.
  14. Pour the remaining eggs to the fried rices and keep gently stirring for a minutes.  Then you can remove the fried rice from the heat and get the rice to the baking pot.
  15. Place the pork chop on the fried rice.  You can cut the pork chop into pieces if preferred.
  16. Put the wok over medium heat again with adding some oil (around 1/2 tsp).  Stir fry the onion for a minute.  Adding celery, tomatoes, and minced garlic next and keep stirring it.
  17. Pour the tomato paste and keep stirring.  In the mean time, stir in ~2tbsp flour.  The tomato paste become condensed 
  18. Pouring in the chicken stock slowly, and adding Worcestershire Sauce and sugar and mix it well.  You can taste the sauce and adjust it with salt or sugar.  Keep boiling it in medium heat.
  19. Sauce become more condensed after 5-10 mins boiling.  You can add some chicken stock or water if it is too condensed; or oppositely if there are too much stocks, you can mix some flour with cold water and pour into the sauces.  Boil the sauce until it feels like the pasta sauce.
  20. Pour and spread the tomato sauce well on the rice.  
  21. Adding Mozzarella or Parmesan Cheese as toppings.
  22. Put the baking pot to the oven and bake it for at least 20 mins.  If the cheese melt too fast or burn quickly, lower the heat and let the pork chop have enough time to cook.  Take it out from the oven and then you can serve the rice.